Updatetime:2025-07-27 09:47:19 View:
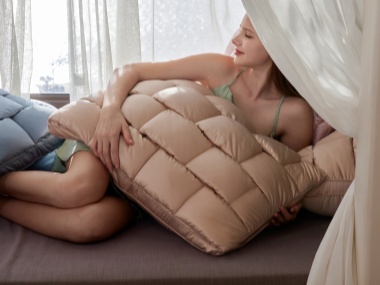
If you're looking to refresh your home decor without breaking the bank, learning how to sew a throw pillow cover is a fantastic skill to master. Not only does it allow you to customize fabrics and sizes, but it’s also an eco-friendly way to repurpose materials. In this detailed guide, we’ll walk you through the entire process, from selecting materials to adding professional finishes like zippers. Whether you're a beginner or an experienced crafter, you’ll find actionable tips to create beautiful, durable covers. By the end, you’ll be equipped to tackle various designs, including versions with closures for easy washing and style updates.
")
Why Sew Your Own Throw Pillow Covers?
Throw pillows are a simple yet effective way to add color, texture, and personality to any room. While store-bought options are convenient, handmade covers offer unique advantages: cost savings, customization, and the satisfaction of creating something yourself. Plus, mastering how to sew a throw pillow cover enables you to match any decor theme—be it modern, rustic, or bohemian. As you progress, you can experiment with different techniques, such as how to sew a throw pillow case for a seamless look or adding functional elements like zippers.
Materials and Tools You’ll Need
Before diving into the sewing process, gather these essentials:
· Fabric (e.g., cotton, linen, or upholstery weight—aim for 1/2 to 1 yard depending on pillow size)
· Measuring tape, scissors, and pins
· Sewing machine or needle for hand-sewing
· Thread that matches your fabric
· Pillow insert or old pillow for sizing
· Optional: Zipper (for enclosed designs), iron, and fabric marker
Pro tip: Always pre-wash your fabric to prevent shrinkage after sewing. If you’re new to sewing, start with a simple envelope-style cover before advancing to zippered versions.
Step-by-Step Instructions: How to Sew a Throw Pillow Cover
This section breaks down the process into easy-to-follow steps. Remember, practice makes perfect—so don’t worry if your first attempt isn’t flawless.
1. Measure and Cut the Fabric
Begin by measuring your pillow insert. Add 1 inch to both the width and length for seam allowances (e.g., for a 16x16-inch insert, cut fabric to 17x17 inches). If you’re making an envelope closure, you’ll need an additional piece for the back overlap. For those wondering how to sew throw pillow covers with precision, accurate cutting is crucial to avoid uneven edges.
2. Prepare the Fabric Pieces
For a basic cover, you’ll need two fabric squares (or rectangles) of the same size. If adding an envelope back, cut one back piece into two overlapping panels. Hem the inner edges of these panels to prevent fraying. This approach is ideal for beginners learning how to sew throw pillow basics.
3. Sew the Pieces Together
Place the fabric pieces right sides together, ensuring any back panels overlap. Pin the edges to secure them, then stitch around the perimeter using a 1/2-inch seam allowance. Leave a small opening for turning the cover right side out. Once turned, press the seams with an iron for a crisp finish.
4. Insert the Pillow and Finish
Carefully insert your pillow through the opening, then hand-stitch the gap closed. For a neater look, you can topstitch around the edges. Congratulations—you’ve just completed a simple cover! This method is a great introduction to how to sew a throw pillow cover, but if you prefer a more secure closure, consider the zippered variation below.
Advanced Technique: How to Sew a Throw Pillow Cover with Zipper
Adding a zipper might seem daunting, but it’s easier than you think. This method ensures your cover stays in place and makes washing a breeze. Here’s a simplified approach:
1. Cut and Prepare the Fabric
Cut two fabric pieces to your pillow size, plus seam allowances. Attach the zipper to one edge before assembling the rest of the cover. Use a zipper foot on your sewing machine for precision.
2. Install the Zipper
Place the fabric pieces right sides together, and sew the zipper along one edge. Once attached, open the zipper partially, then stitch the remaining three sides. This technique is key for how to sew a throw pillow with zipper designs, as it hides the zipper for a professional look.
3. Final Touches
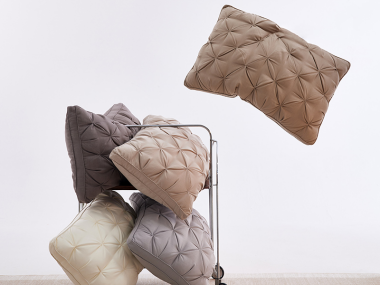
Turn the cover right side out, press the seams, and insert the pillow. This method is perfect for frequently used pillows, as the zipper prevents shifting. If you’re sourcing materials, consider reaching out to a reputable throw pillow supplier for high-quality zippers and inserts.
")
Tips for Success and Common Mistakes to Avoid
· Choose the Right Fabric: Medium-weight fabrics like canvas or duck cloth hold up better than delicate materials.
· Practice on Scraps: Before sewing the actual cover, test stitches on fabric scraps to adjust tension and length.
· Avoid Overstuffing: Use an insert that matches your cover size to prevent bulging.
· Press as You Go: Ironing seams at each stage ensures a polished result.
Conclusion
Learning how to sew a throw pillow cover is a rewarding project that enhances your home and sewing skills. From basic covers to advanced zippered styles, this guide covers everything you need to get started. Remember, the key is to take your time and enjoy the creative process. If you need materials, don’t hesitate to contact a trusted throw pillow supplier for durable inserts and fabrics. Happy sewing!
FAQs
1. Do I need a sewing machine to make a throw pillow cover?
While a sewing machine makes the process faster and creates more durable seams, you can absolutely hand-sew a throw pillow cover. Use a strong backstitch for the seams, especially if you are creating a cover without a zipper. For how to sew a throw pillow with zipper designs, a sewing machine is highly recommended for a secure and professional finish.
2. What is the best fabric for a beginner to use?
Cotton or cotton-blend fabrics, like quilting cotton or canvas, are ideal for beginners. They are stable, easy to cut, and don't stretch excessively, making them simpler to sew. As you gain confidence, you can explore linen, velvet, or upholstery fabrics.
3. How much fabric do I need for a standard 18x18 inch pillow?
For an 18x18 inch pillow insert, you will need a fabric square that is approximately 19x19 inches for a simple cover. If you are making an envelope closure or a cover with a zipper, you may need a slightly larger piece to account for the seam allowances and the specific design. Always measure your insert first and add at least 1 inch to both dimensions for seams.
4. Can I wash a handmade throw pillow cover?
Yes, and this is one of the major benefits of making your own! Always check the care instructions for your specific fabric. Generally, it's best to machine wash on a gentle cycle in cold water and tumble dry on low. Removing the cover first, which is easy if you've learned how to sew a throw pillow cover with zipper, helps maintain the shape and longevity of both the cover and the insert. For high-quality inserts and fabrics, consult your throw pillow supplier for specific care recommendations.